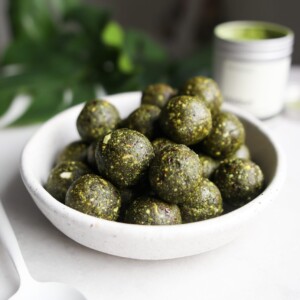
No Bake Matcha Bliss Balls Recipe
May 21, 2018 • Updated Nov 22, 2024
This page may contain affiliate links, which means I will make a small commission for products purchased through my link.
Matcha lovers, if you’re craving an easy, energizing little snack that has that matcha flavor we know and love, these matcha balls are just what you need. These little bites are packed with wholesome ingredients and, the best part is that they’re naturally sweetened, vegan, and gluten-free. These bliss balls are my favorite way to enjoy matcha in treat form. Whether you need a nourishing afternoon snack or a mindful energy boost, they’ve got you covered.

Table of Contents
Why You’ll Love These Matcha Balls
These matcha balls offer more than just great flavour – they’re packed with functional benefits! Matcha provides antioxidants like EGCG, supporting cellular health, and contains L-theanine, which helps promote calm focus without the jitters.
Combined with the gentle caffeine boost from organic matcha, this healthy snack is perfect for sustained energy throughout the day. Oats give your body fiber, while nuts provide healthy fats to keep you satisfied longer. With dates as a natural sweetener, these bites are a mindful, nourishing way to fuel your body and the perfect on the go, no bake snack!
Bliss ball recipes (energy balls, energy bites, protein balls) are really the perfect snack. They require no baking and have wholesome ingredients that nourish and energize your body. Check out my 7 easy & delicious bliss ball recipes for more delicious energy bites.
Ingredient Notes & Substitutions
- Rolled Oats: Oats bring structure and fiber, making the texture chewy. You can swap with quick oats or even quinoa flakes.
- Roasted pistachios: These give the balls creaminess, a pop of green, and healthy fats! Cashews or walnuts work if you don’t have pistachios on hand.
- Roasted almonds: Almonds give a toasty crunch. Hazelnuts or sunflower seeds could easily take their place.
- Matcha: Earthy and energizing, matcha gives a subtle caffeine boost. Use green tea powder or skip for a plain version.
- Vanilla extract: Vanilla is used to round out flavors with a hint of sweetness. You can also use maple or almond extract if you prefer!
- Medjool dates: The star for sweetness and stickiness. Swap with dried figs or prunes if needed.
- Salt: Feel free to omit if you’re avoiding sodium.
- Hot water (if needed): Helps bind everything if the mix feels too dry. Coconut water or a little plant milk works too!
See the printable recipe card below for the full recipe and ingredient amounts!
How to Make Matcha Bliss Balls
Step 1: Add oats, pistachios, almonds, matcha and salt to a high-speed blender or food processor and pulse to break down into a coarse texture.
Step 2: Next add dates and vanilla extract and pulse until a sticky dough starts to form. You may need to scrape down the sides of the blender to help it along.
Step 3: Roll into bite sized balls and store in the fridge.

Secrets to Success
- If your blender is struggling with the sticky dough, try soaking the dates in warm water for 10-15 minutes before adding them.
- Work in smaller batches or pulse gradually to avoid overheating the motor of your blender.
- If your dough feels too sticky, try adding a spoonful of oats or almond flour to absorb extra moisture.
- For dry mixtures that won’t bind, soften the dates in warm water, or add a drizzle of plant milk to help things along.
- Make sure your nut butter is well-stirred to avoid oily or clumpy results – smooth consistency will yield the best dough. A touch of almond butter, peanut butter, sunflower butter, or cashew butter can elevate the flavour and help everything come together.
- Add a handful of shredded coconut, cacao nibs, or chia seeds for extra texture.
Serving Tips
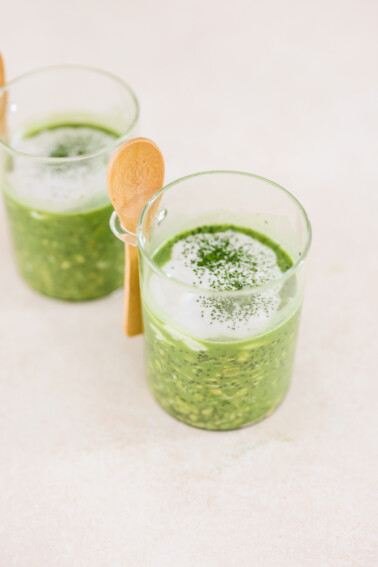
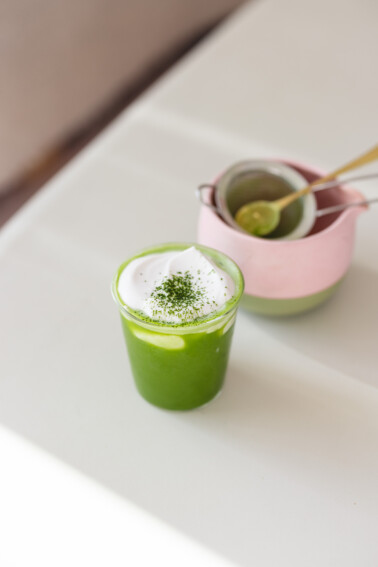
- Serve your matcha balls with a warm or iced matcha latte.
- Enjoy one or two before a workout for quick, sustained energy.
- Drizzle with melted dark chocolate or dust with extra matcha for a fancier treat.
- Serve alongside fruit, nuts, or coconut yogurt (or this vegan yogurt) for a balanced snack plate.
Fridge: Place them in an airtight container, and they’ll stay fresh for up to 7 days.
Freezer: For longer storage or if you’re meal-prepping or making a big batch, these freeze really well! Store in a freezer-safe container, and they’ll last up to 3 months.
Recipe FAQs
Healthy means something different to everybody but for me, these are healthy. Matcha balls are full of fibre from the oats, healthy fats from the nuts, and natural sugars from the dates. Plus, matcha adds antioxidants and a little energy boost.
Yes! If you’re sensitive to caffeine, decaf matcha will work.
Yes! Use sunflower or pumpkin seeds instead of pistachios for a nut-free version of these matcha balls.
More Snack Recipes


If you make this recipe, be sure to let me know what you think with a star rating and comment below! Follow me on Instagram for more delicious recipes!
Matcha Bliss Balls
Ingredients
- 1/4 Cup Rolled Oats
- 3/4 Cup Roasted Pistachios
- 1/4 Cup Roasted Almonds
- 1 tbsp Matcha
- 1 tsp Vanilla Extract
- 12-15 Medjool Dates pitted
- Pinch Salt
- 1 tsp Hot Water if needed
Instructions
- Add oats, pistachios, almonds, matcha and salt to a blender and pulse to break down into a coarse texture.
- Next add dates and vanilla extract and pulse until a sticky dough starts to form. You may need to scrape down the sides of the blender to help it along.
- Roll into bite sized balls and store in the fridge.
Notes
- If your blender is struggling with the sticky dough, try soaking the dates in warm water for 10-15 minutes before adding them.
- Work in smaller batches or pulse gradually to avoid overheating the motor of your blender.
- If your dough feels too sticky, try adding a spoonful of oats or almond flour to absorb extra moisture.
- For dry mixtures that won’t bind, soften the dates in warm water, or add a drizzle of plant milk to help things along.
- Make sure your nut butter is well-stirred to avoid oily or clumpy results – smooth consistency will yield the best dough. A touch of almond butter, peanut butter, sunflower butter, or cashew butter can elevate the flavour and help everything come together.
- Add a handful of shredded coconut, cacao nibs, or chia seeds for extra texture.
Nutrition information is automatically calculated, so should only be used as an approximation.

2 Comments