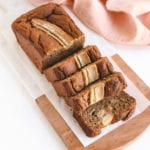
The Best Gluten-Free Vegan Banana Bread (no eggs or oil!)
This gluten-free vegan banana bread is perfectly moist and easy to make. It's oil-free, refined sugar-free, & eggless! The best healthy treat!
Servings: 12 servings
Ingredients
- 1/3 cup non-dairy milk + 1 tbsp apple cider vinegar
- 2 tablespoons ground flax seeds
- 1/2 cup pure maple syrup
- 1 cup mashed ripe bananas* roughly 3-4 bananas
- 2 heaping tablespoons creamy roasted almond butter or other nut/seed butter
- 1 tsp pure vanilla extract
- 1 cup quinoa flour
- 1/2 cup oat flour
- 2 tsp ground cinnamon
- 1 tsp baking soda
- 1/2 tsp sea salt
- 1/2 tsp baking powder
Instructions
- Preheat your oven to 350F and prepare your baking pan by lining with parchment paper. The pan I used measures roughly 8.5 x 4.4 inches. See notes below about baking dish recommendations**
- In a small bowl, combine your non-dairy milk and apple cider vinegar and allow to sit for about 2 minutes or until slightly thicker. This creates a mock “buttermilk” effect.
- In a large bowl, whisk together wet ingredients (maple syrup, mashed banana, nut butter, vanilla, almond milk mixture) along with your ground flax.
- Sift in your remaining dry ingredients and mix until combined and a smooth batter forms.
- Transfer mixture into lined baking pan and pop into the oven for about 35-45 minutes (you may need to bake for additional 5-10 minutes if mixture looks undercooked). I recommend starting with 35 minutes, checking by poking a toothpick into the center, and baking longer as needed. This time will vary based on the size/shape of the pan you’re using.
- Once baked and lightly golden brown on top, allow the loaf to cool for 30 minutes before enjoying or slicing (I know, this is the hardest part!).
Notes
Secrets to Success
- B-A-N-A-N-A-S: My most important reminder–please use very, super duper, über ripe bananas. The spottier, the better. This is important because it will not only be the correct texture to mash but will also add enough moisture and sweetness to the batter. Using overripe bananas makes it easy to bake this bread without needing to add extra oil.
- Gluten-Free Flour Blend: As mentioned, I like to use a blend of oat flour and chickpea flour. You can opt to use all oat flour as well, but I find the texture is much better when using a blend and less prone to becoming gummy or uncooked in the center. That’s the reality of gluten-free baking sometimes.
- Flour Alternative: If you’re not avoiding gluten, go ahead and use regular all-purpose wheat flour! You just want to keep an eye on the bake time as the bake time may vary slightly.
- For an Even Bake: I definitely recommend going with a wider, more shallow baking pan if you have one. You could even use a small casserole pan like this Staub 10.5 x 7.5 one if you’d like, to ensure that the center is baked through and not gummy. This is especially important if you’re not using the suggested flour mix and are using all oat flour.
- Parchment Paper: I highly recommend lining your baking dish with parchment paper, or greasing it so that the loaf won’t stick to the pan. I usually like to lay a small piece of parchment paper across my baking dish so that I can use it to gently lift the loaf out of the pan once it’s ready.
Serving Tips
- Once baked and lightly golden brown on top, allow the loaf to cool for 30 minutes before enjoying or slicing (I know, this is the hardest part!)!
- I like to wiggle a knife around the edges to loosen them before serving. Be gentle with your banana bread, friends!
Storage Tips
- Store in an airtight container at room temperature for up to 2 days. Move to the refrigerator to extend the shelf life up to 5 days, though I know it will be gone before then! Because it’s eggless banana bread, it has a longer shelf life at room temperature, but in humid climates, bread is always best stored in the fridge.
- To freeze, let the loaf cool completely. Cut into individual slices or leave the loaf whole. Wrap in plastic wrap and place wrapped slices or loaf into an airtight, freezer-safe container. Thaw overnight, toast up a slice, and enjoy!