Easy No Bake Key Lime Cheesecake Recipe (Vegan)
Jun 03, 2022 • Updated Jan 08, 2024
This page may contain affiliate links, which means I will make a small commission for products purchased through my link.
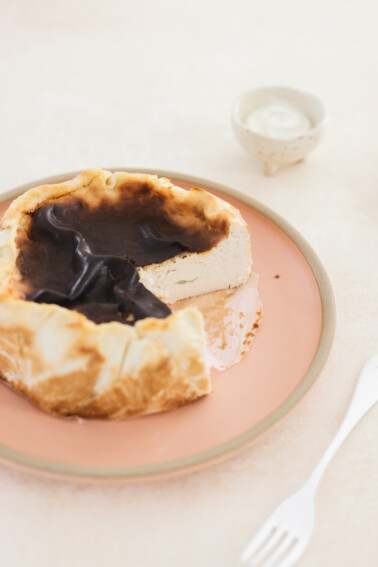
This No Bake Key Lime Cheesecake recipe is a dairy-free dessert that requires no baking! It’s vegan, gluten-free, and has an unbelievably creamy filling that’s full of zesty key lime flavor. Complete with a homemade, no-bake crust, you will love this perfect dessert recipe!

What Makes This Recipe Great
If you’ve ever tried key lime pie, you know that the flavor of key limes is just absolutely divine! The sweetness, the tanginess– just such a flavor party! Today, though, we’re taking those amazing flavors and turning them into a creamy cheesecake! Think the tartness of key lime pie meets creamy classic cheesecake.
Traditional Key Lime Cheesecake is made with plenty of dairy, using both cream cheese and butter. This avocado version, however, is the perfect way to enjoy the creamy, rich, and zesty flavors we all love without any dairy. It’s 100% vegan, gluten-free, and requires no baking, as it sets up in the freezer. Once ready to serve, simply thaw and dig in! It has simple ingredients that are easy to find in most grocery stores. Plus, its a super easy recipe, and you don’t need an oven!
For the cheesecake filling, we’re replacing your standard dairy cream cheese mixture with creamy California Avocados and cashews. Once blended, they create a velvety cream you would never know is vegan. For an extra kick, we’re using key limes, which help brighten up the flavors even more.
Paired with both a crunchy and chewy crust made from dates, oats, and buckwheat, this No Bake Key Lime Cheesecake is the perfect summer dessert: it’s decadent yet refreshing and absolutely irresistible! Top with your favorite whipping cream and lime slices, and enjoy!
Ingredient Notes

- Avocado. I know this may seem shocking, but trust me!
- Cashews. Raw and soaked for creaminess in the filling.
- Fresh Key limes. For flavor, acidity, and zing. When paired with blended cashews, it also yields an incredible cheesecake-like flavor.
- Maple syrup. Our flavour builders
- Vanilla. Either vanilla bean paste or vanilla extract will work!
- Salt. Just a pinch to balance the flavors.
- Medjool dates. For a natural sweetness with caramel flavors.
- Rolled oats. Use gluten-free oats if needed.
- Buckwheat groats. You can also substitute this with more oats or use a nut like pecans or toasted almonds.
- Creamy nut butter. Any will work. I used cashew to keep on theme, but this just helps to bind the crust together.
- Cold, filtered water. Just as needed. To adjust the texture of both the crust and the filling.
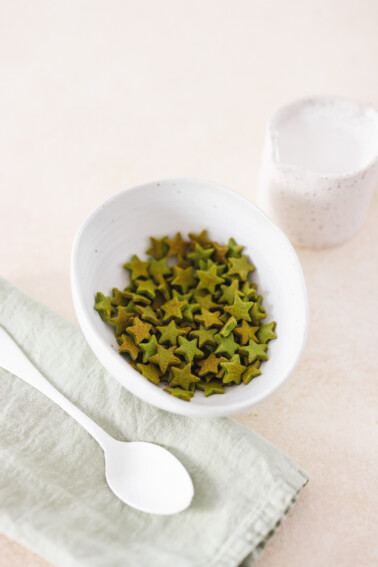
- Matcha powder. This is optional for color!
Using Avocados To Replace Dairy
Ripe, fresh Avocados make the perfect dairy-free base and have a naturally rich, creamy texture. I love substituting avocados for dairy because it’s a great fat that also adds nutrition (and a beautiful green color that is perfect for this key lime cheesecake).
In place of traditional full-fat cream cheese or store-bought vegan cream cheese, you can instead use whole-plant ingredients! Avocados have the fats that love you back! Not only that, but it’s the perfect way to put any of your ripe fruit to use.
Step-by-Step Instructions
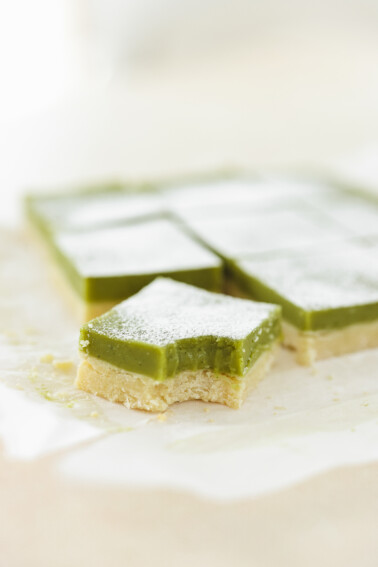
Making this sweet treat requires only 20 minutes of hands-on prep time! You can make one large cheesecake or 2-3 mini cheesecakes, as I did. You can also make key lime cheesecake bars/squares if desired.

Here’s how to put it all together:
- Start by soaking your cashews in a large mixing bowl filled with filtered water for about two hours or overnight.
- Prepare your homemade crust by pulsing together all crust ingredients, excluding water. Pulse until a sticky crumble forms, you should be able to form it between your fingers. If the mixture feels dry, adjust by adding water by the teaspoon, as needed.
- Press the crust mixture into a springform pan to create an even crust. Set aside.
- Drain your cashews and then add to the blender with all remaining cheesecake filling ingredients. Use a tamper to help break down the ingredients, and blend until completely smooth.
- Spoon or pour the mixture into your pans and then tap down to remove any air bubbles. Smooth the surface with the back of a spoon and place it in the freezer to set for three hours or overnight.
- To serve, let it thaw for a few minutes at room temperature, then slice it with a sharp knife, gently remove it from the pan, and enjoy.
- If you’d like, you can garnish it with coconut whipped cream (or your favorite whipped topping), key lime slices, and key lime zest.
Secrets to Success
- If you’re not able to find key limes, regular limes work just as well! Be sure to use fresh lime juice for best results.
- I don’t recommend bottled key lime juice, as fresh key lime juice has better flavor and yields better results.
- An alternative to the no-bake crust I made is a classic graham cracker crust using vegan graham crackers and melted butter (vegan). You can use a food processor to break up the crackers into graham cracker crumbs, combine them with the butter, and press the mixture into your pan.
- As far as equipment goes, you do not need an electric mixer like a stand mixer or hand mixer. You will need a high-powered blender for this recipe.
Storage Tips
This no-bake cheesecake recipe must be stored in the freezer until ready to eat. Leftovers can be stored in an airtight container in the fridge for up to two weeks. Be sure to let it thaw before you serve or slice.
To store in the freezer, wrap slices in plastic wrap and store them in a freezer-safe bag or container for up to 3-4 months. Thaw and serve.

Recipe FAQs
Yes! It’s essential to store this no-bake version in the freezer to set, but once it’s set, it’s firm and ready to eat!
With a no-bake recipe, there’s no cooking involved! All you need to do is blend up your ingredients, add to the pan, and freeze! This is especially nice on a hot summer day when you don’t want to turn the oven on!
More No-Bake Desserts
Vegan Honeydew Ice Cream (Vegan Melona Bars)
If you make this recipe, be sure to let me know what you think with a comment below! Follow me on Instagram for more delicious recipes!
Easy No Bake Key Lime Cheesecake Recipe (Vegan)

Ingredients
- Filling Ingredients
- 1 ripe Fresh California Avocado, seeded and peeled
- 2 cups raw cashews
- ⅔ cup maple syrup
- ¼ cup fresh key lime juice
- 1 tsp vanilla extract or paste
- 2 tsp ceremonial grade matcha powder
- ½ tsp salt
- Crust Ingredients
- 6-7 large medjool dates pitted
- ½ cup rolled oats
- ½ cup buckwheat groats
- 2 tbsp creamy nut butter of choice
- Cold filtered water, as needed
- Garnish
- 2-3 key limes for garnish
- coconut whip or dairy free whipped cream for garnish
Instructions
- Start by soaking your cashews in filtered water for about two hours or overnight.
- Prepare your crust by pulsing together all crust ingredients excluding water. Pulse until a sticky crumble forms, you should be able to form it between your fingers. If the mixture feels dry, adjust by adding water by the teaspoon, as needed.
- Press crust mixture into springform pans to create an even crust. Set aside.
- Drain your cashews and then add to the blender with all remaining filling ingredients. Using a tamper to help break down the ingredients, blend until completely smooth.
- Spoon the mixture into your pans and then tap down to remove any air bubbles. Smooth the surface with the back of a spoon and place in the freezer to set for three hours, or overnight.
- To serve, let thaw for a few minutes then gently remove from the pan and enjoy.
- If you’d like, you can garnish with coconut whipped cream, fresh slices of key lime and zest.
Notes
Secrets to Success
- If you’re not able to find key limes, regular limes work just as well! Be sure to use fresh lime juice for best results.
- I don’t recommend bottled key lime juice, as fresh key lime juice has better flavor and yields better results.
- An alternative to the no-bake crust I made is a classic graham cracker crust using vegan graham crackers and melted butter (vegan). You can use a food processor to break up the crackers into graham cracker crumbs, combine them with the butter, and press the mixture into your pan.
- As far as equipment goes, you do not need an electric mixer like a stand mixer or hand mixer. You will need a high-powered blender for this recipe.
Storage Tips
This no-bake cheesecake recipe must be stored in the freezer until ready to eat. Leftovers can be stored in an airtight container in the fridge for up to two weeks. Be sure to let it thaw before you serve or slice. To store in the freezer, wrap slices in plastic wrap and store them in a freezer-safe bag or container for up to 3-4 months. Thaw and serve.Nutrition information is automatically calculated, so should only be used as an approximation.

2 Comments